

Product Highlights

Get Extra Storage for Free

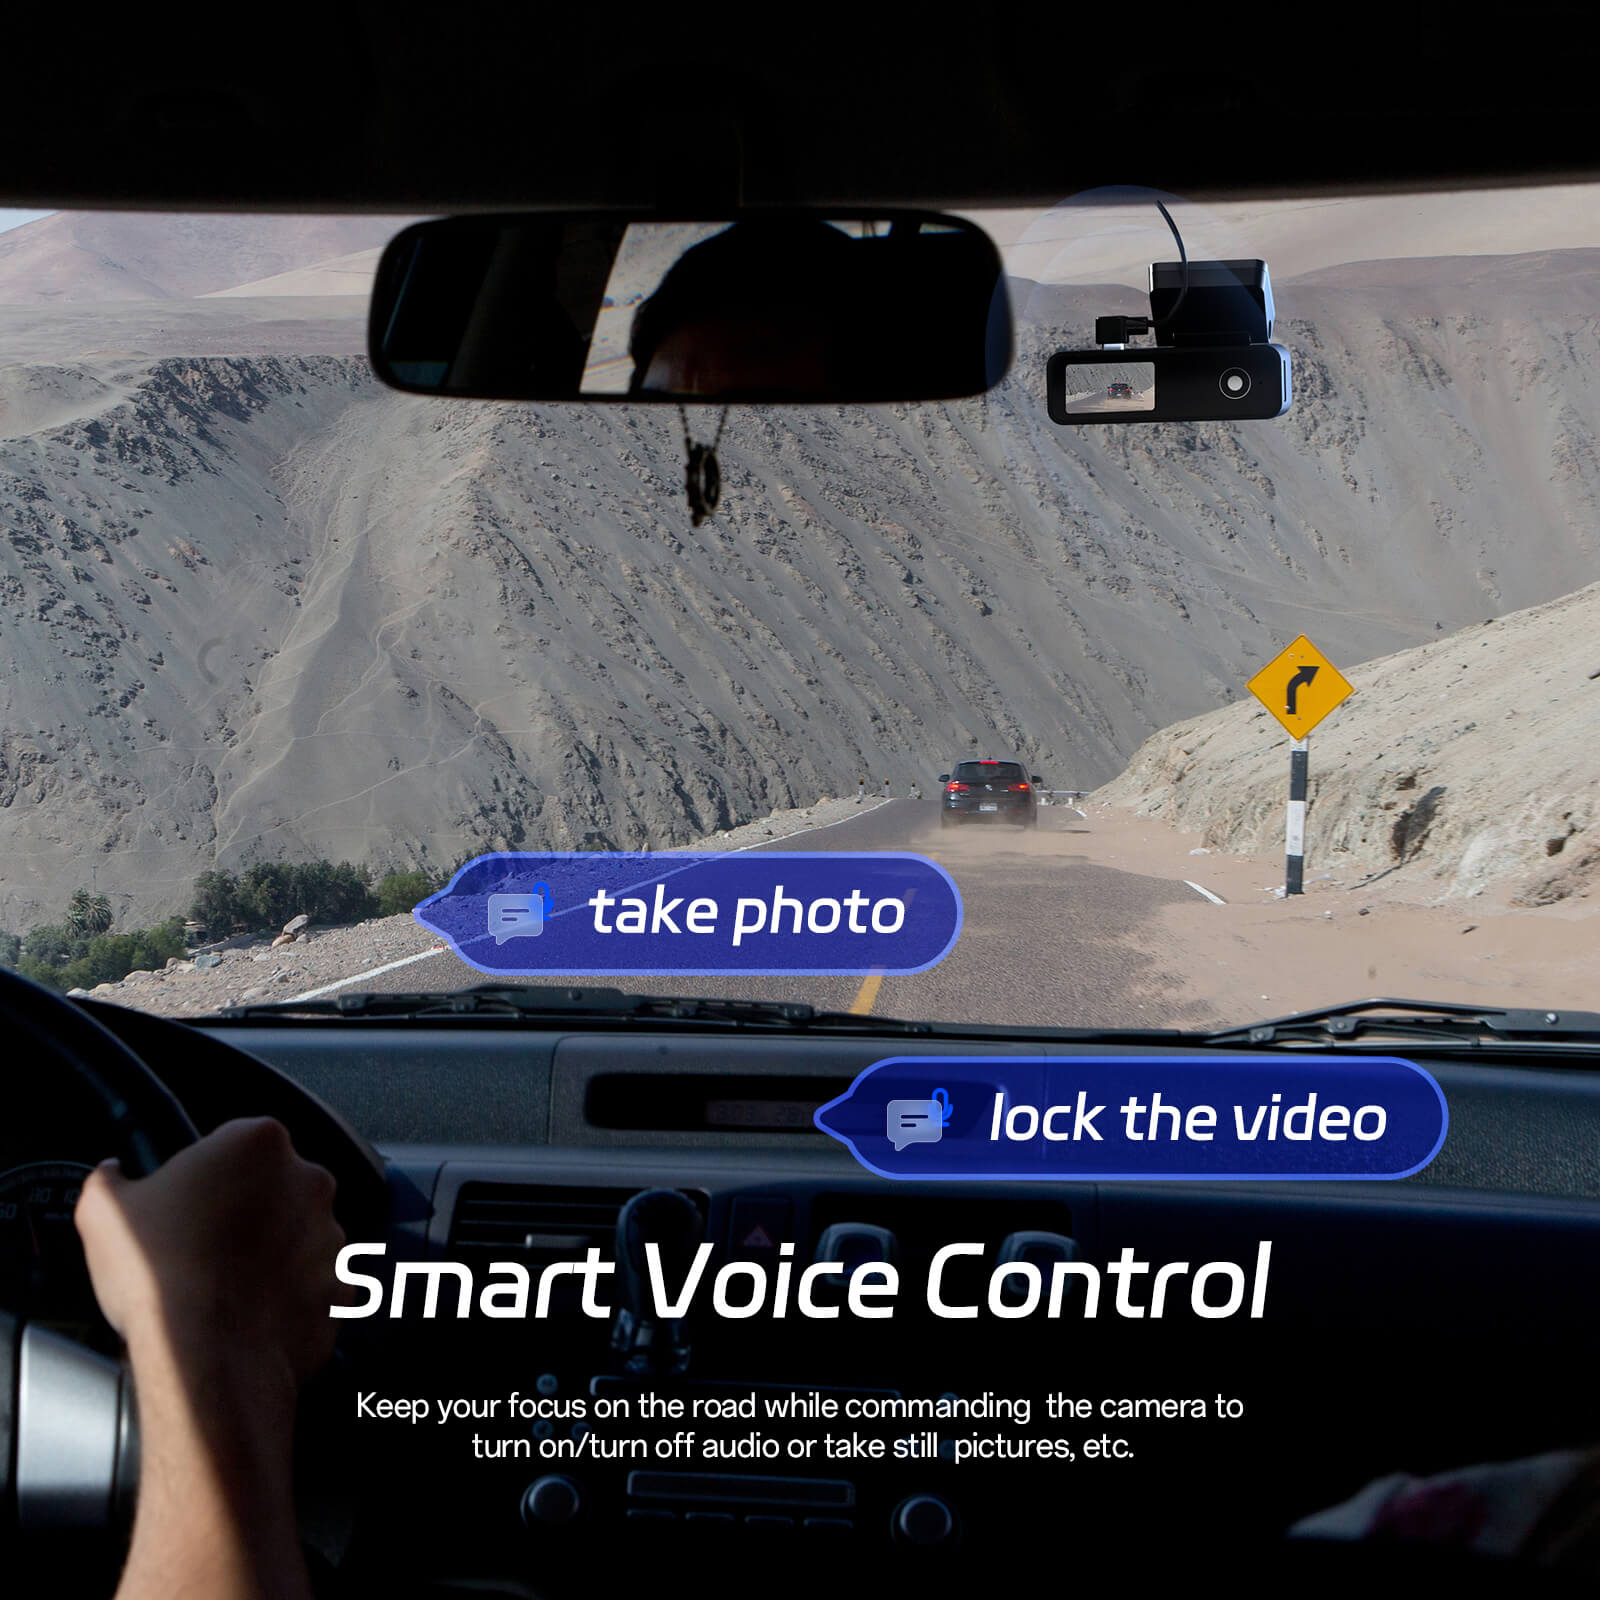
Control with voice commands

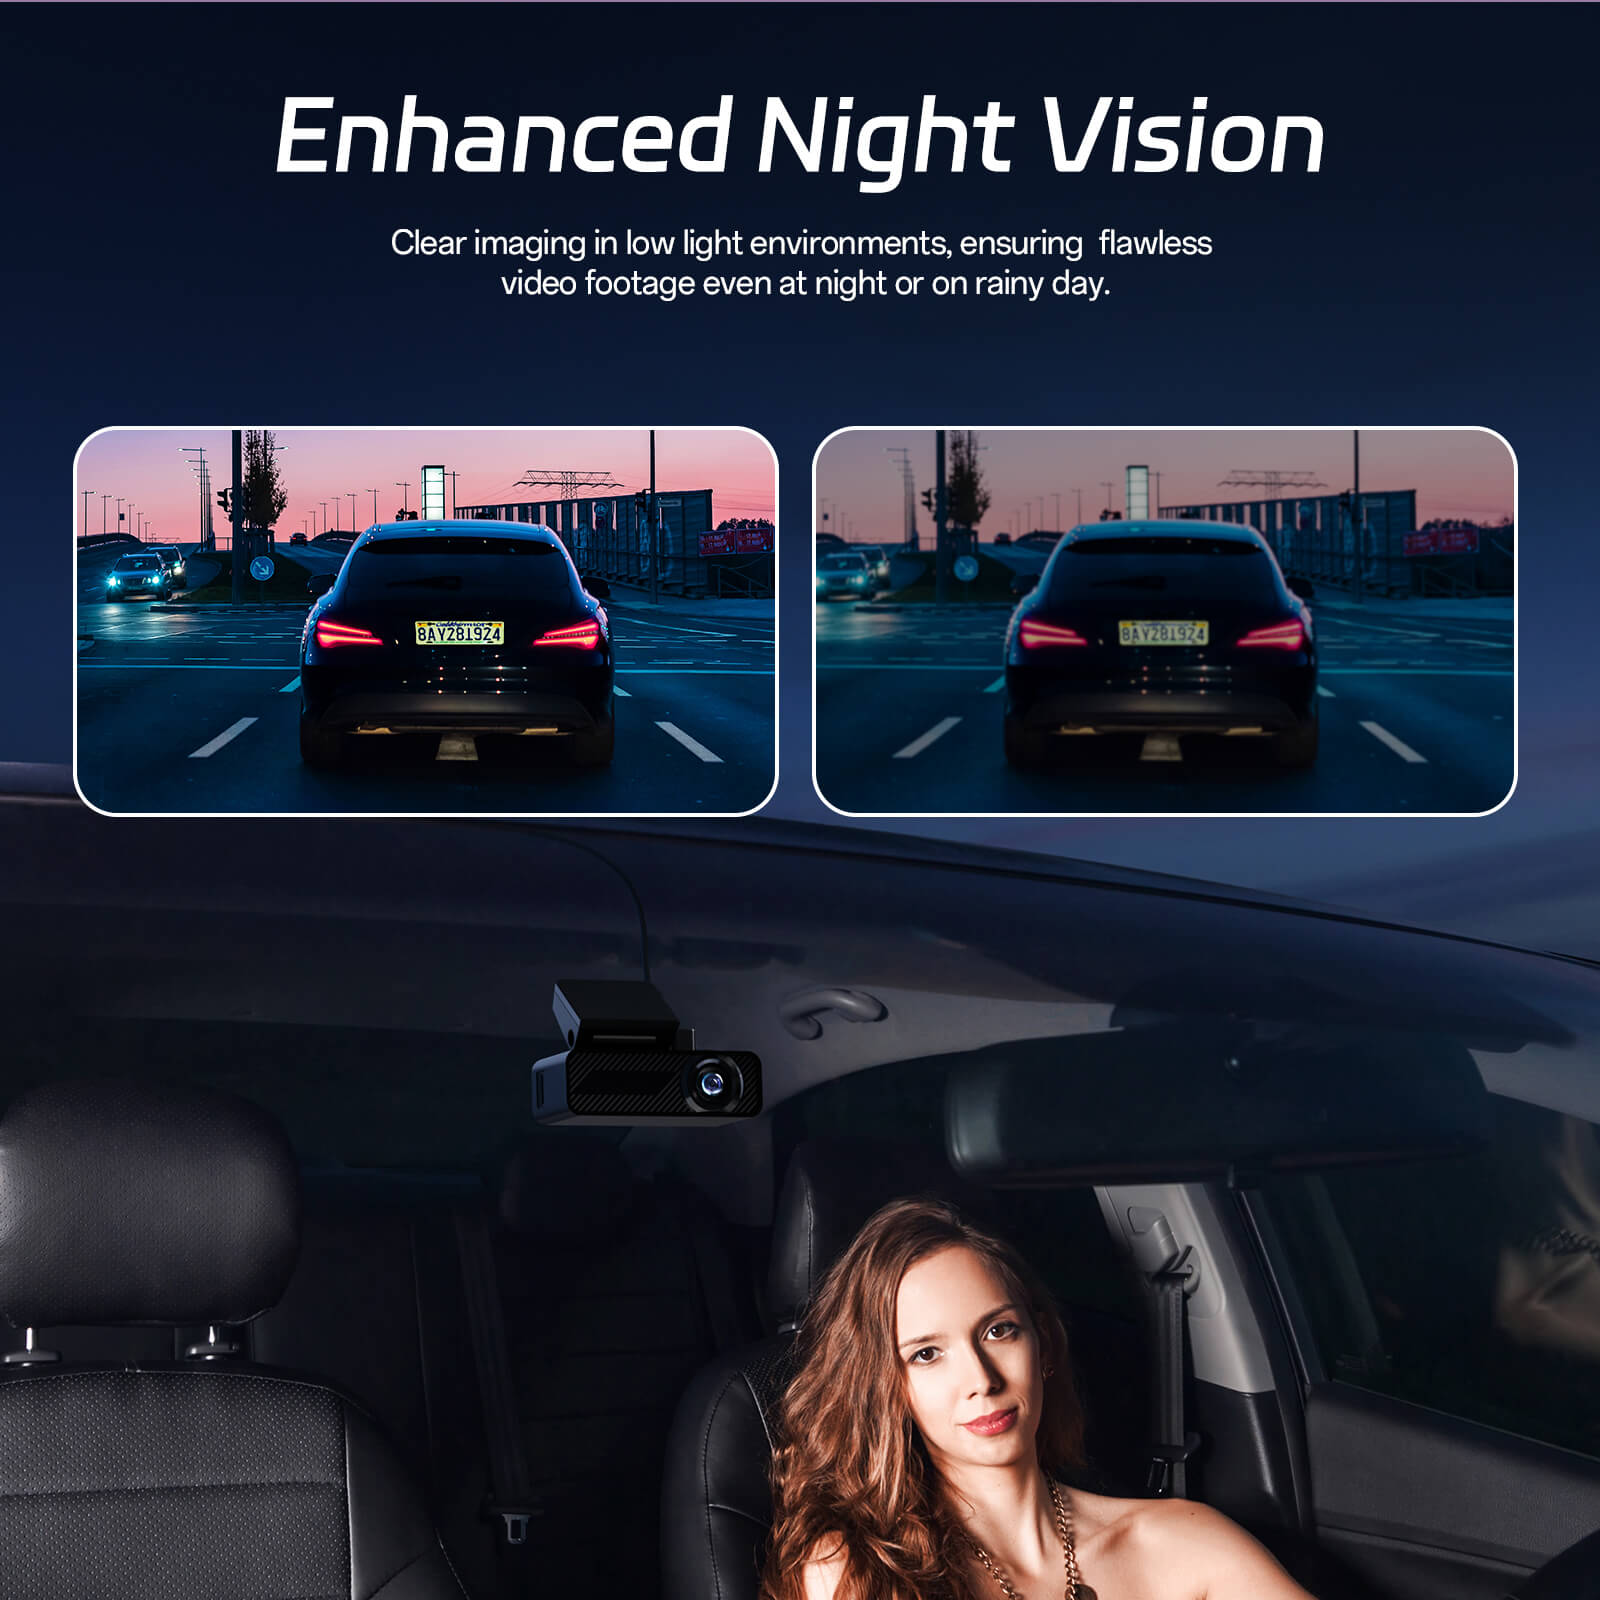
Enhanced clarity in low light

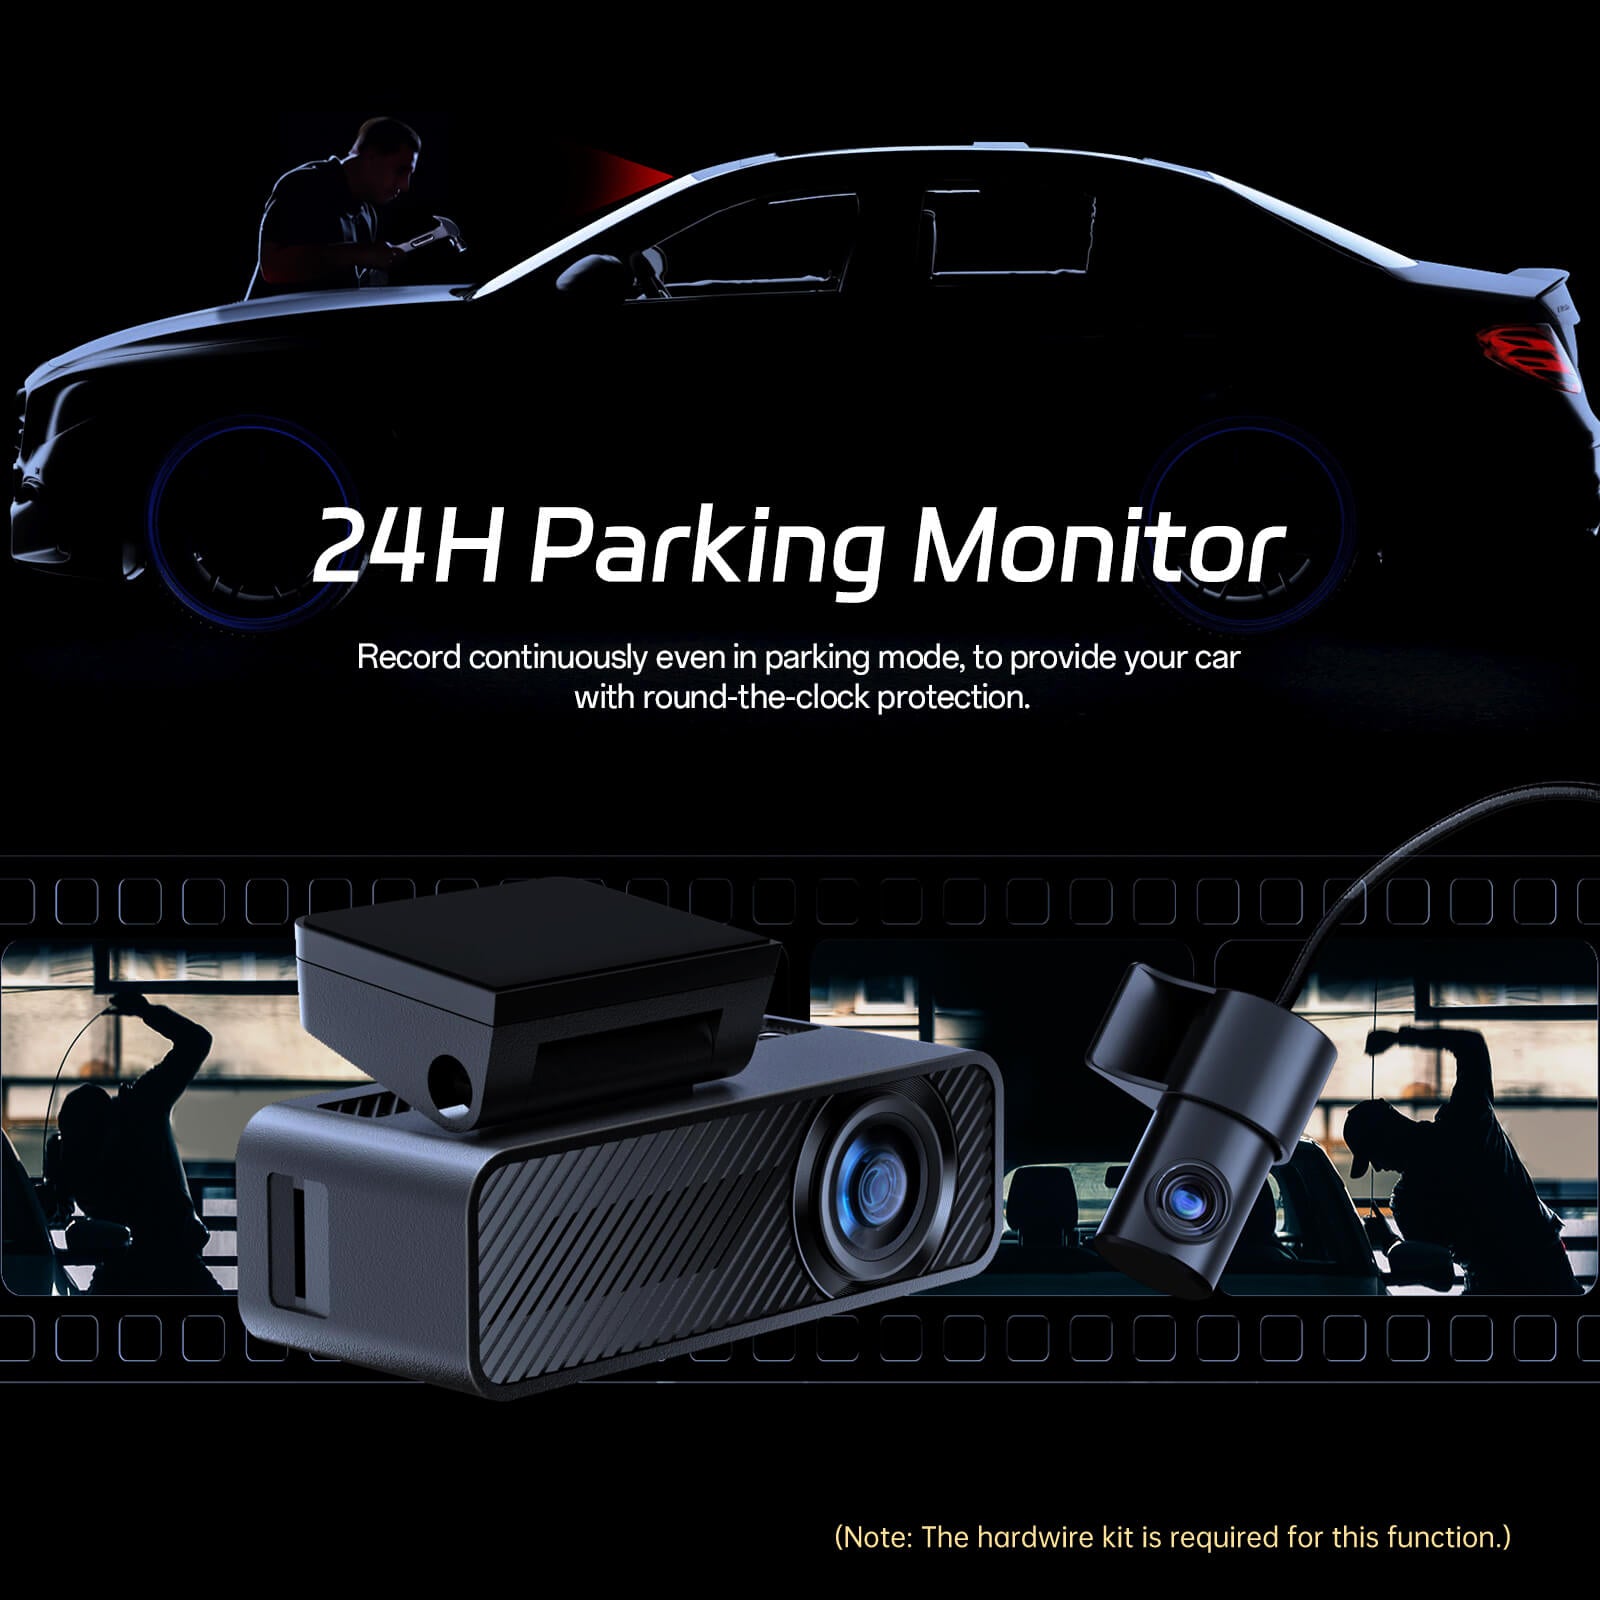
Watches while you're away

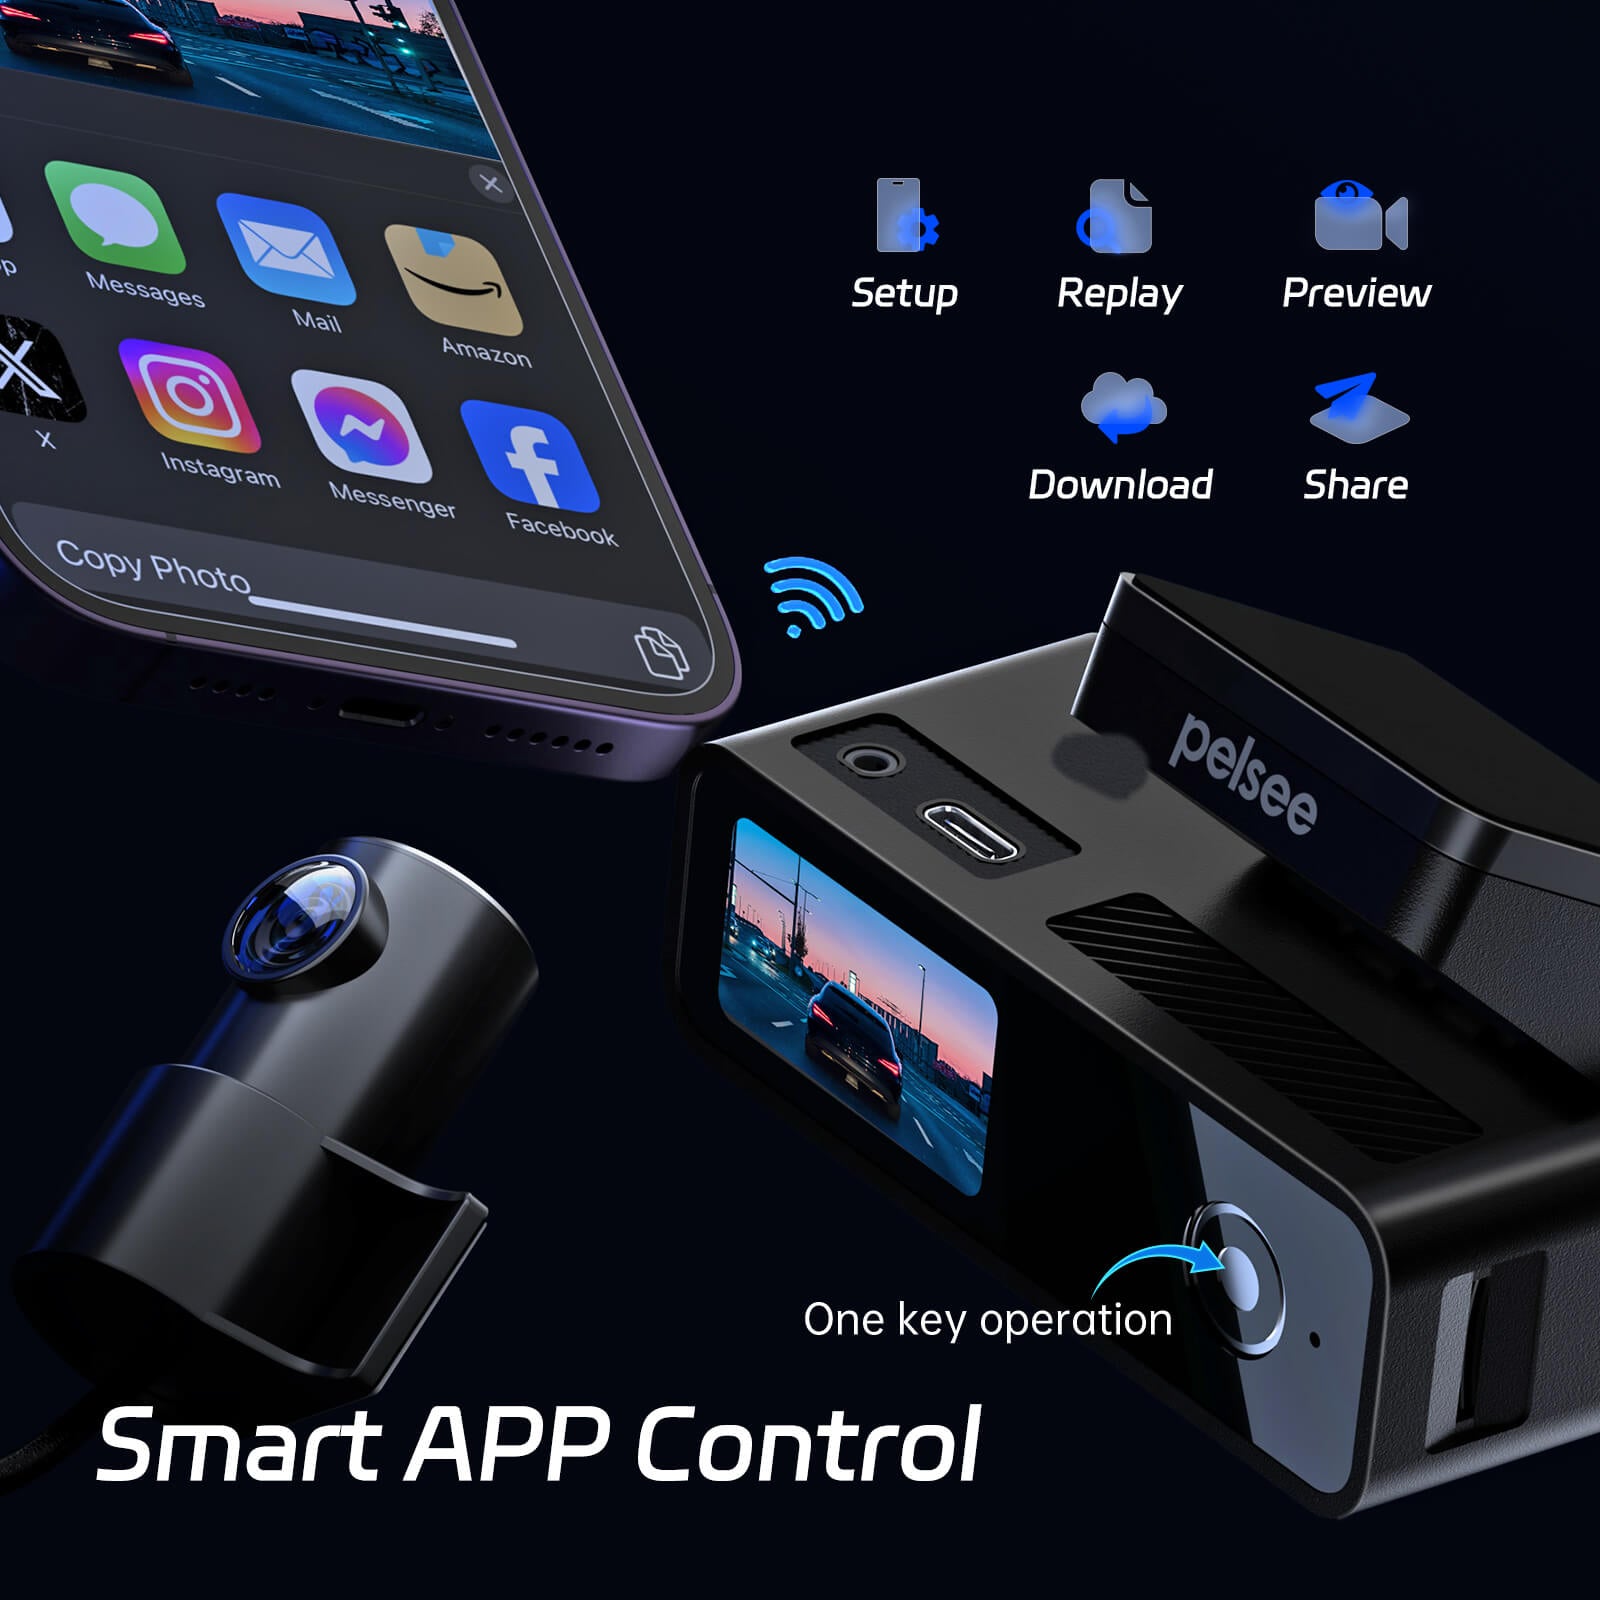
Seamless Wireless Connection

Ensure uninterrupted recording
Pelsee P1 Duo Dash Cam
- 4K+1080P Dual Dash Cam: The Pelsee dash cam offers exceptional clarity with a 4K front camera (3840*2160P/30fps) and a 170° wide-angle lens. The rear camera captures stunning 1080P footage with a 150° wide-angle view, ensuring you have top-notch evidence in any situation.
- Built-in WiFi & APP Control: Experience real-time previews and share your journey with loved ones using WiFi and the "Pelsee Cam" app. Download, view, replay, and edit footage directly from your smartphone with ease.
- Voice-activated Control: Control the dash cam hands-free with spoken commands to start/stop recording, capture photos, or lock videos, allowing you to focus on driving and ensuring safety.
- Excellent Night Vision: With a 1.5/F aperture and 6-layer optical precision, the camera captures vital details in low-light conditions. Its advanced image processing minimizes glare and distortion from daylight or vehicles behind you, providing clear and undistorted footage.
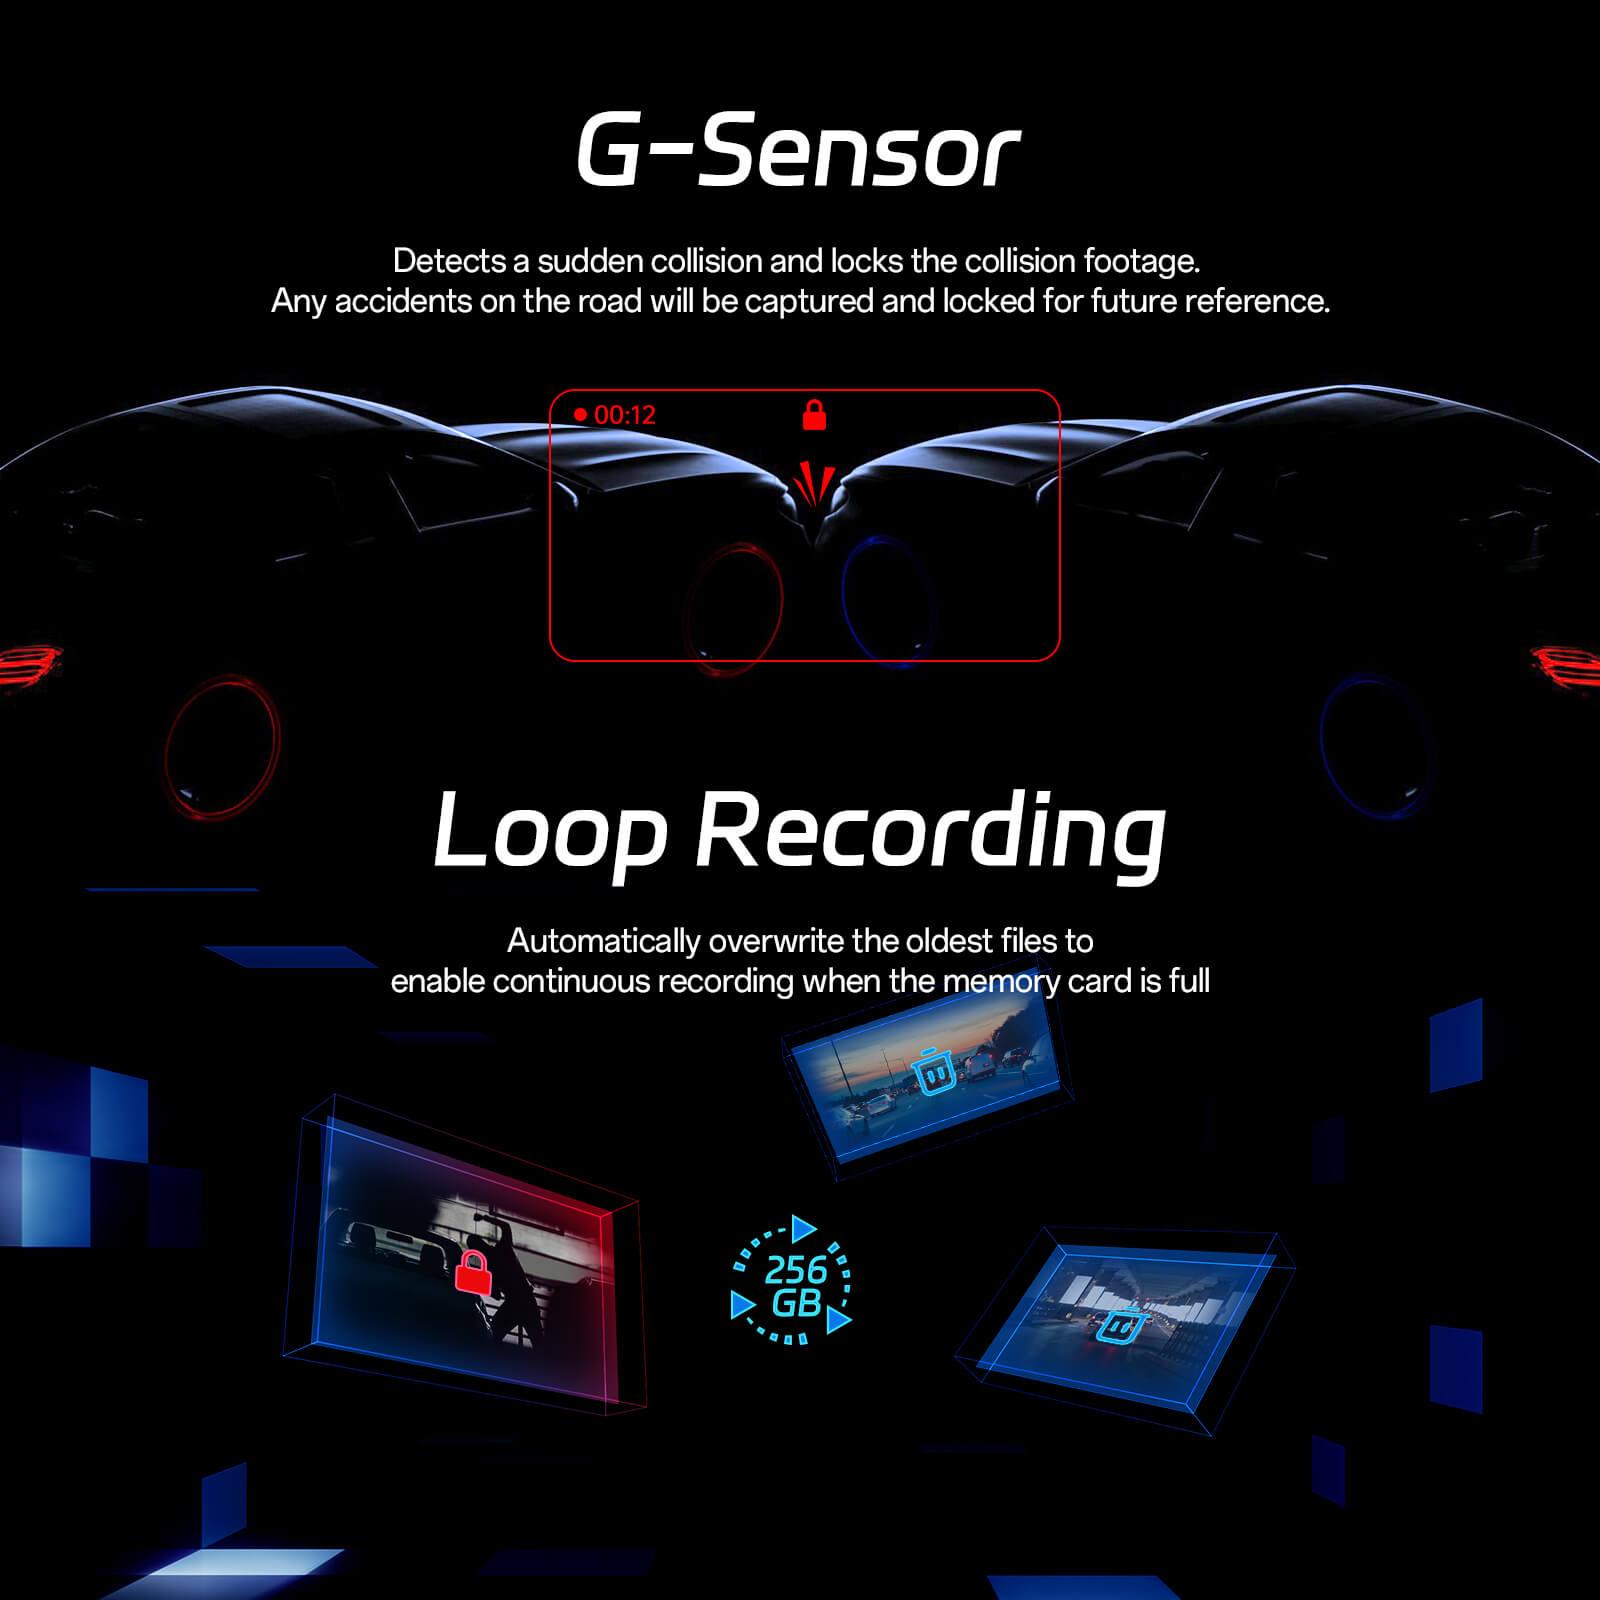
- 24-Hour Parking Mode: Automatically transitions to Parking Mode when the car is stationary, recording continuously. Time-lapse recording helps save power and storage. G-Sensor locks footage if a collision is detected. ACC hardwire kit required
- 64GB Loop Recording: The dash cam automatically overwrites the oldest files, ensuring continuous recording even when the card is full. Includes a 64GB card, with support for up to 256GB for extensive storage.
- 1.5" Display & Easy Operation: The 1.5" IPS screen offers a clear readout of the dash cam's status, minimizing setting errors. The user-friendly design ensures intuitive operation. For any issues, our customer support will assist you promptly within 24 hours.
Product Highlights
Get Extra Storage for Free
Control with voice commands
Enhanced clarity in low light
Watches while you're away
Seamless Wireless Connection
Ensure uninterrupted recording
What's in the box?
1*Mini WiFi Dash Camera with 64GB Card
1*Rear Camera (19.7 ft/6 m)
1*Car Charger (11.5 ft/3.5 m)
Installation Tool
User Manual
Our guarantee
- 12-Month Warranty Policy
- Free Shipping on All Orders
- Reply to emails within 24 hours on weekdays
Pairs well with
Pelsee P1 Duo Dash Cam
If you have any questions, you are always welcome to contact us. We'll get back to you as soon as possible, within 24 hours on weekdays.
-
Shipping Information
Use this text to answer questions in as much detail as possible for your customers.
-
Customer Support
Use this text to answer questions in as much detail as possible for your customers.
-
FAQ’s
Use this text to answer questions in as much detail as possible for your customers.
-
Contact Us
Use this text to answer questions in as much detail as possible for your customers.
Pelsee P1 Duo Dash Cam$59.99 |  Pelsee P1 Pro Dash Cam$99.99 | 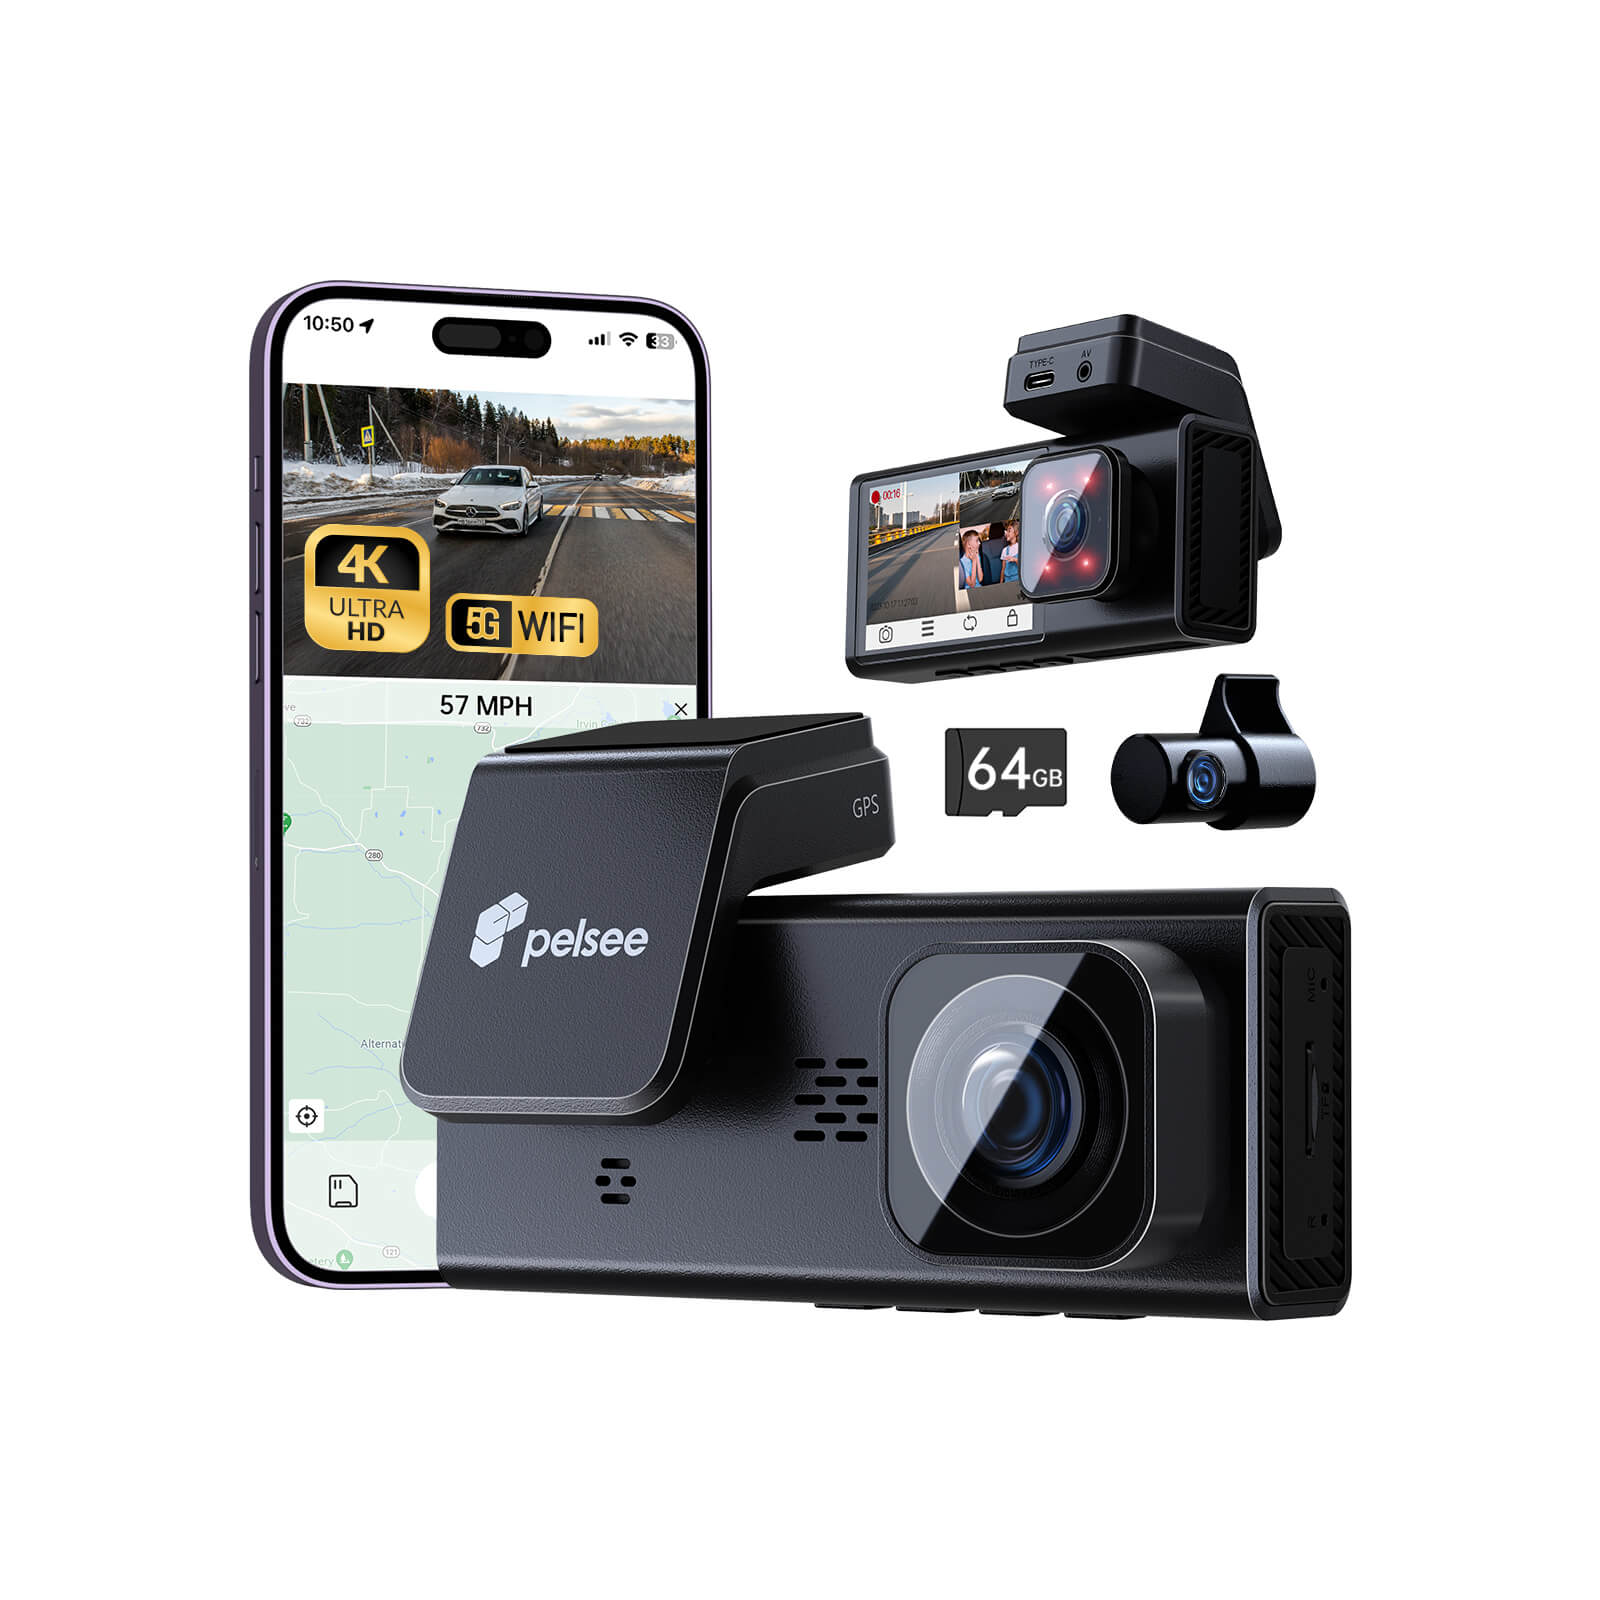 Pelsee P2 Trio Dash Cam$89.99 | 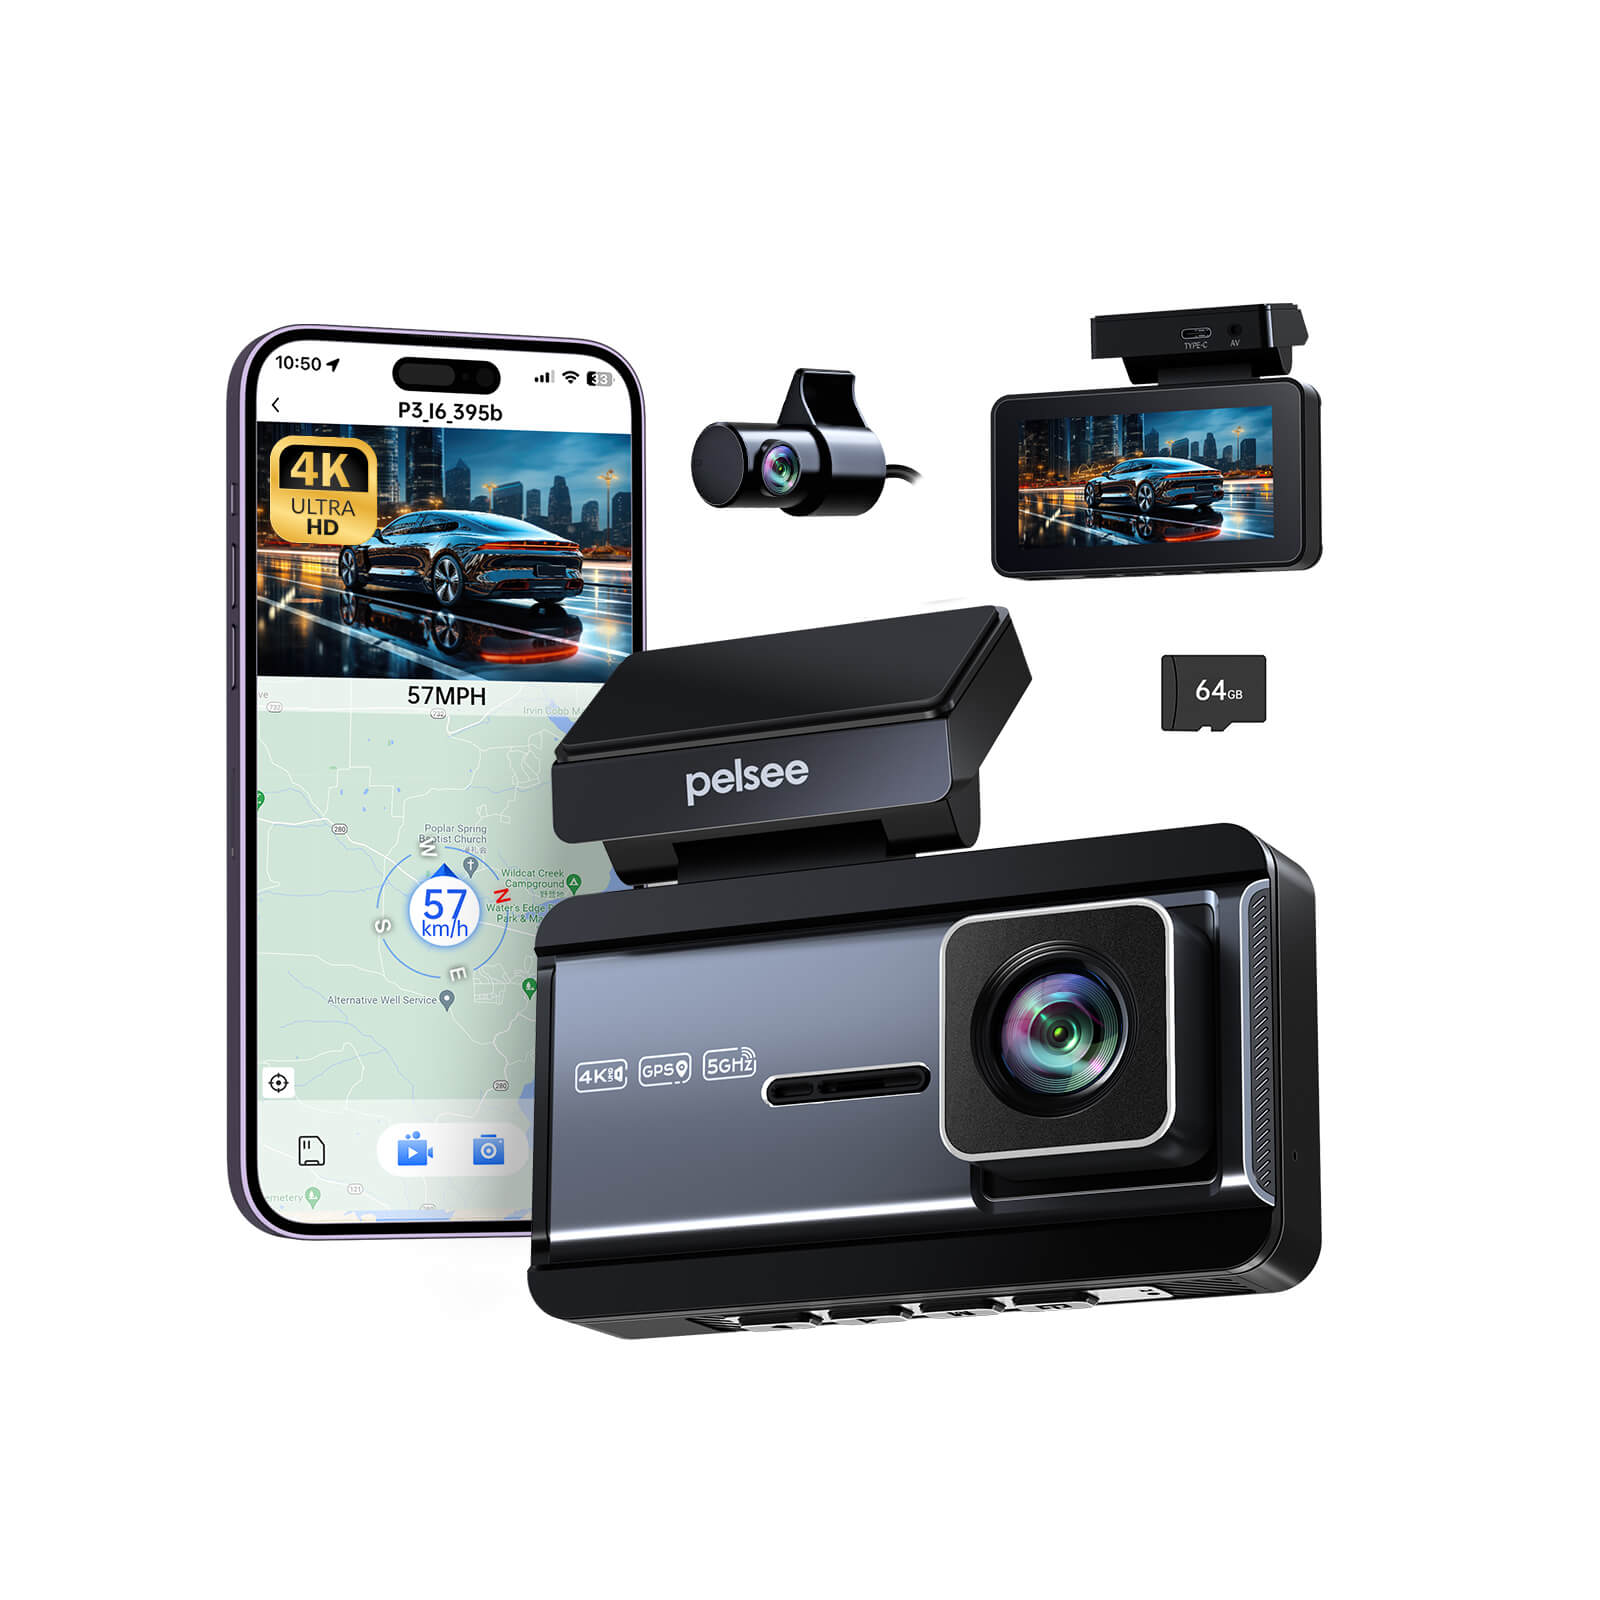 Pelsee P3 Dash Cam$79.99 | |
|---|---|---|---|---|
| dash cam | ||||
Price |
$59.99 |
$99.99 |
$89.99 |
$79.99 |
Screen |
|
|
|
|
Resolution |
|
|
|
|
Smart Driving System |
|
|
|
|
Wi-Fi Connectivity |
|
|
|
|
GPS Tracking |
|
|
|
|
Parking monitor |
|
|
|
|
Recommended SD Card |
|
|
|
|
Voice Control |
|
|
|
|


How do I connect the Wi-Fi of my Pelsee P1 Duo HD dash cam to my phone?
Option 1 – Manual Connection:
- Power on your dash cam and keep your phone nearby.
- Enable Wi-Fi on your phone.
- In your phone’s Wi-Fi settings, find the network name that matches your dash cam.
- Enter the default password 12345678. It’s normal to see “No Internet Connection.”
- Return to the Pelsee Cam App and wait a few seconds — you’ll then see “Access Camera” appear.
Option 2 – In-App Connection:
- Turn on the dash cam and your phone’s Wi-Fi.
- Open the Pelsee Cam App and tap “Connect Camera” or the “+” icon.
- Confirm to open your Wi-Fi list, select your dash cam’s Wi-Fi name, and enter 12345678.
- When connected, go back to the app and wait a few seconds for synchronization.
Once connected successfully, the “Access Camera” option will appear.
Why is there a slash on the Wi-Fi signal of my Pelsee HD dash cam?
A slash on the Wi-Fi signal icon usually means that your Pelsee dash cam’s Wi-Fi is disabled. You can try the following steps to turn it back on:
- Use Voice Command:
Say “Turn on Wi-Fi” to your dash cam and check whether the red slash on the Wi-Fi icon disappears. - Perform a Factory Reset (if the Wi-Fi is still off):
Power on the dash cam.
Press and hold the power button for about 8 seconds.
You’ll hear two beeps (make sure it’s quiet).
Release the button after the second beep.
The dash cam will announce that the reset is complete, and the screen will flash once.
After resetting, check your phone’s Wi-Fi list again to see if your dash cam’s Wi-Fi network appears. Once it does, you can reconnect through the Pelsee Cam App to restore normal function.
My phone shows “No Internet Connection” after connecting to the Pelsee dash cam WiFi — is that normal?
Yes, this is completely normal. When your phone connects to the Pelsee HD dash cam with WiFi, the Wi-Fi link is designed only for communication between your phone and the dash cam — it does not provide internet access.
Seeing the message “No Internet Connection” simply means the dash cam’s Wi-Fi is successfully connected and ready to use with the Pelsee Cam App.
You can now view live footage, download videos, or adjust settings directly from your phone.
My phone shows the Pelsee dash cam WiFi as connected, but the app says “Connection Failed.” Why?
If your phone connects to the Pelsee HD dash cam with WiFi but the Pelsee Cam App displays “Connection Failed,” this usually happens on iPhones when the app doesn’t have permission to access the local network.
To fix this:
- Open your iPhone Settings.
- Scroll down and tap Pelsee Cam App.
- Make sure “Local Network” permission is enabled.
Once this setting is turned on, return to the app and try connecting again — the dash cam should now link successfully.
My Pelsee dash cam won’t connect and shows “Connection Failed.” What should I do?
If your Pelsee HD dash cam with WiFi shows “Connection Failed,” please follow these steps to complete the connection:
- Power on the dash cam and keep your phone close to it.
- On your phone, open Wi-Fi Settings.
- Find and select the Wi-Fi network that matches your dash cam’s name.
- Enter the default password 12345678.
It’s normal to see “No Internet Connection” after connecting. - Return to the Pelsee Cam App and wait a few seconds for the connection to sync.
When successful, the “Access Camera” option will appear.
If the issue persists, please check the following:
- Make sure no VPN, antivirus, or mobile hotspot is running on your phone.
- These apps may interfere with the Wi-Fi connection or prevent your dash cam from syncing correctly.
Can I retrieve old or deleted videos from my Pelsee dash cam?
If your Pelsee HD dash cam with WiFi has deleted footage or the memory card has been formatted, unfortunately, the old videos cannot be recovered.
To avoid losing important recordings, we recommend regularly downloading and backing up videos to your phone or computer through the Pelsee Cam App before the files are overwritten.